
Install the first node
The first node installs in two stages like a single node, and comes up as a cluster of one that serves the API while it is alone.
Stage 1: choose New cluster
Section titled “Stage 1: choose New cluster”Boot the ISO. The first screen asks what the machine is for.
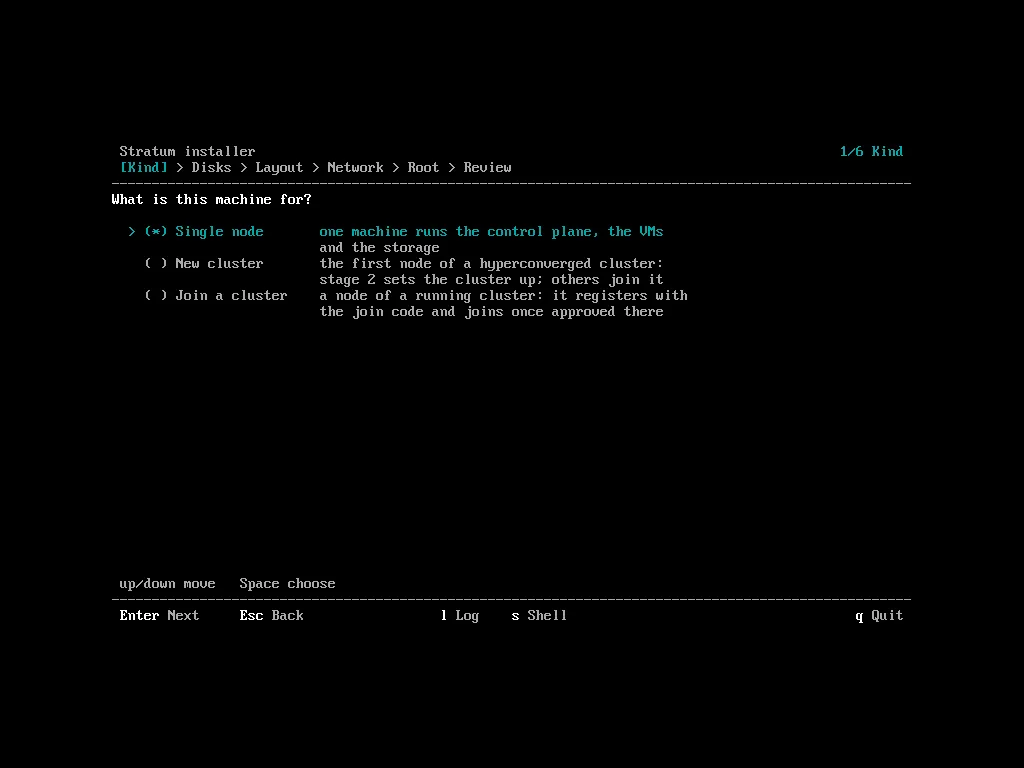
Choose New cluster. The remaining screens are those of stage 1: the OS disks and their layout, the management NIC and host name, root access, and a review. Use a static address on the management NIC.
Other disks
Section titled “Other disks”The review lists every other disk that holds data and wipes them by default: the data disks of an old install, a former cluster’s Ceph disks, old LVM volumes.
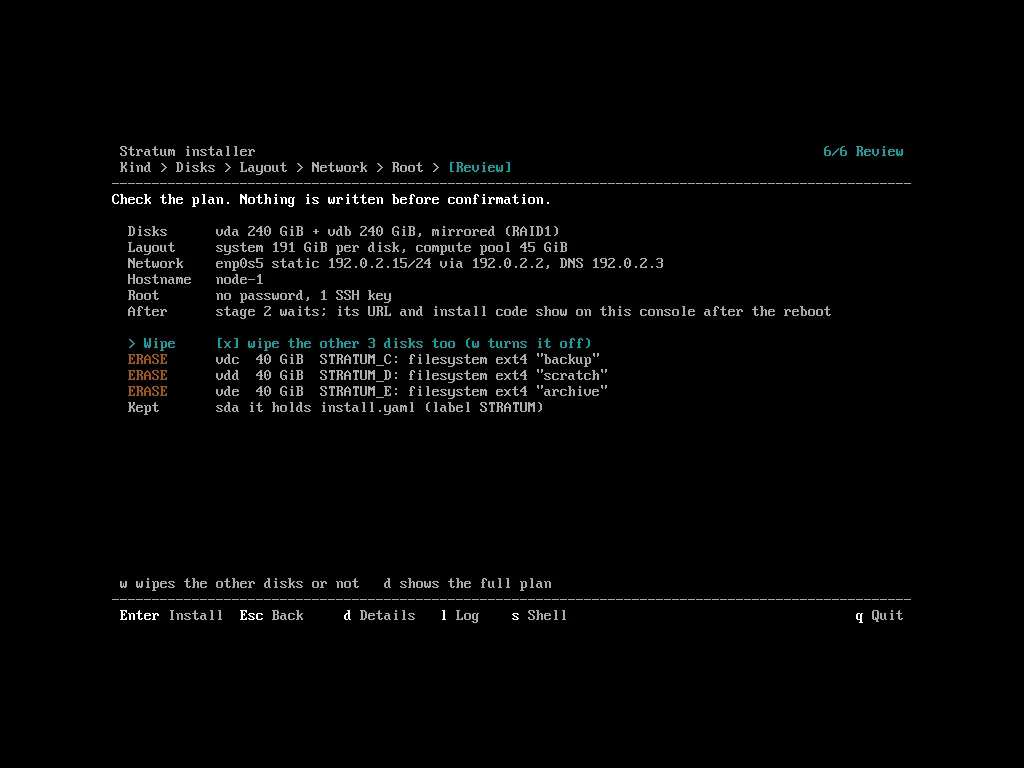
- Press w to turn it off and keep them.
- To wipe, type the phrase the screen shows (
wipe 3 disks). - Not touched: the install medium, mounted disks, removable and USB disks, multipath paths, and disks with no hardware ID. The review names the ones it keeps.
- Reinstalling over the disks of a former cluster works: they are wiped, and the node installs as new.
- Unattended:
wipe_other_disks: trueininstall.yaml. Without the key an unattended install wipes only its own OS disks.
When the screen says Installed, remove the install medium, then press enter.
Stage 2: found the cluster
Section titled “Stage 2: found the cluster”The console shows the installer’s address, install code and TLS fingerprint, as
for a single node. Connect to it from a browser or
with stratum-installer. In the web installer the Machine step shows the
install mode that stage 1 chose, HA, first node; the steps are:
-
Machine. Read-only: CPU, memory, disks, NICs.
-
Cluster. An optional name, and the number of control-plane nodes, 3 or 5. Nodes beyond that join as
hypervisor.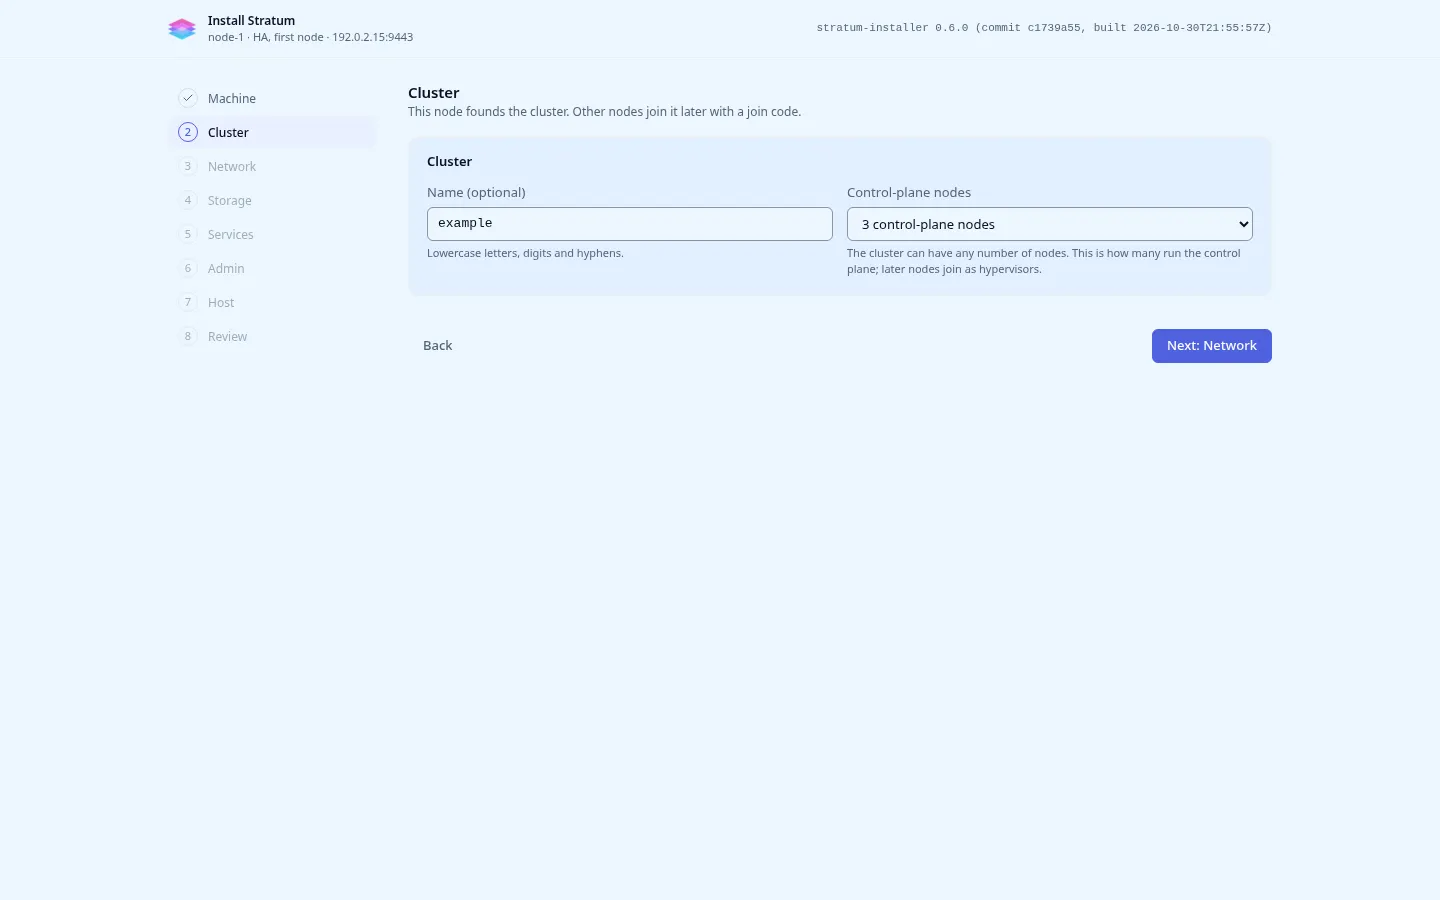
The Cluster step: name and control-plane nodes. -
Network. The cluster’s networks and how this node’s NICs carry them:
- Storage and Overlay: CIDR, VLAN and MTU. The installer fills in a
free
/24for each. - Links beyond the management NIC: a NIC, a bond of two NICs, or a VLAN, each with the network it carries. With one NIC, add none.
- VM traffic:
bridgedorrouted-host, the provider VLAN, and the floating IP ranges. - Service VIPs: the six addresses (API, Postgres, OpenBao, OVN northbound,
OVN southbound, Metrics), plus the Provider gateway address for
routed-host. - Names: the DNS parent domain and the region.
The management NIC is the one stage 1 set up. Stage 2 never rebuilds it, so the node’s address and the service addresses must be on its subnet.
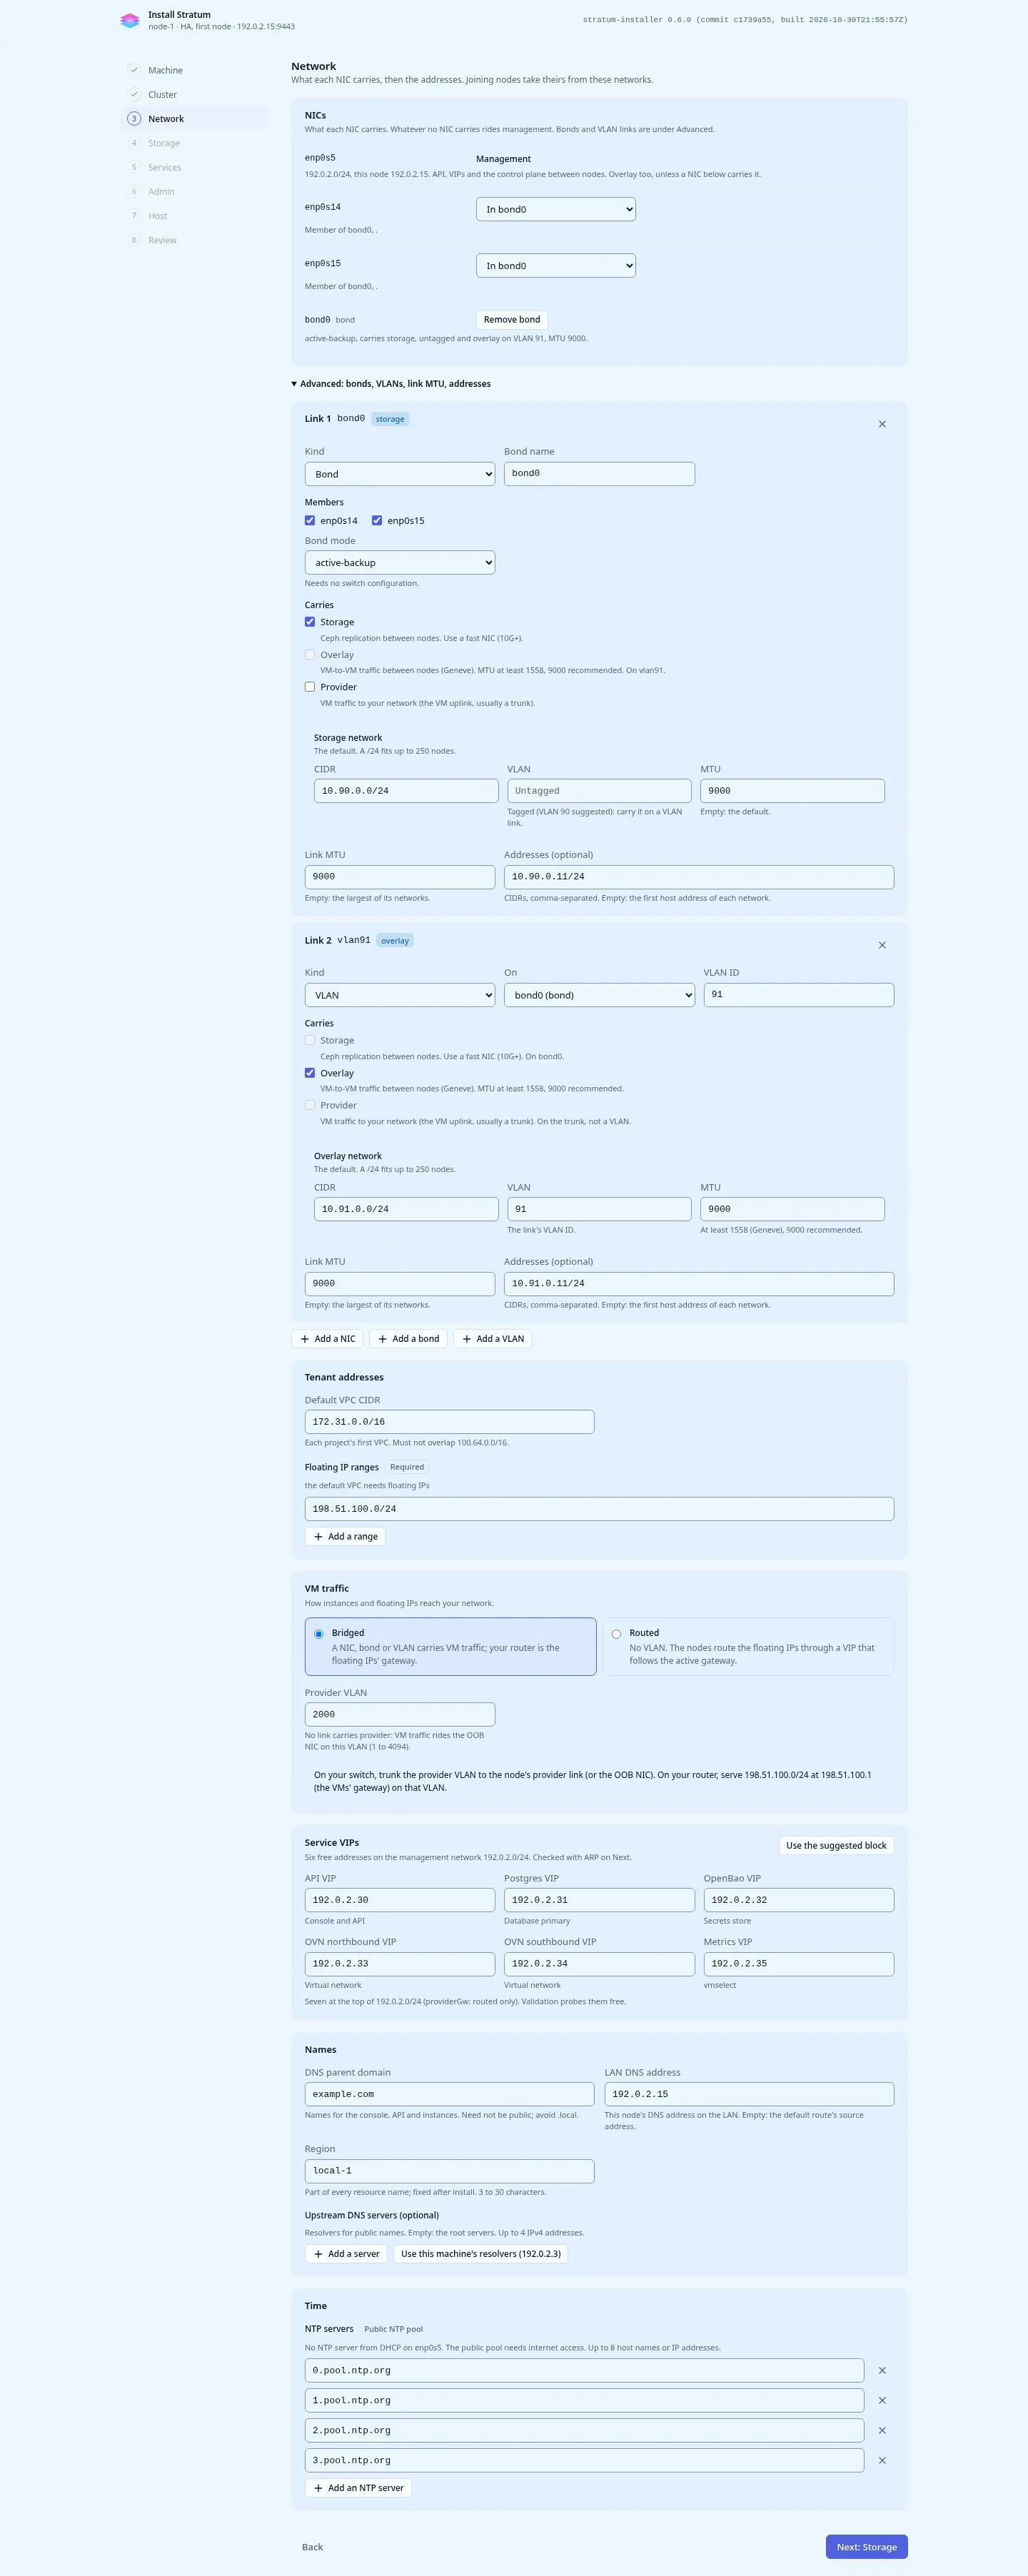
The Network step: storage and overlay networks, links, VM traffic and service VIPs. - Storage and Overlay: CIDR, VLAN and MTU. The installer fills in a
free
-
Storage. Select each data disk and give it a use: Compute pool (LVM-thin), or Ceph OSD. Selected disks are wiped. A Ceph disk is only reserved: Ceph itself is set up afterwards.
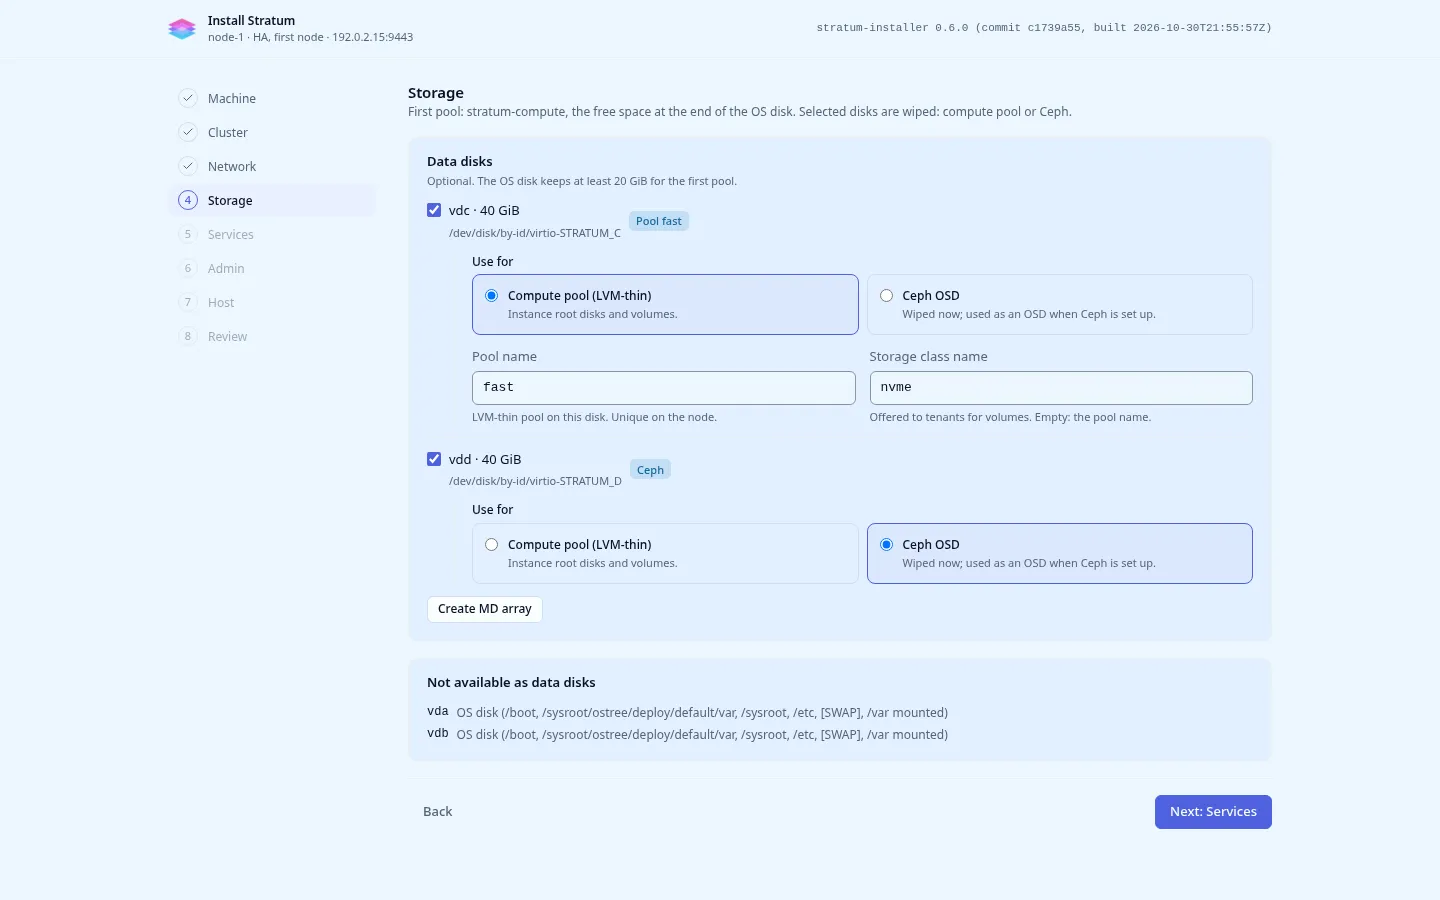
The Storage step: a compute pool disk and a disk reserved for Ceph. -
Services, Admin, Host and Review, as in a single node. On a cluster the Host step has only the advanced settings, and development mode is off by default. The review shows what happens to every disk and the
node.yamlthe install will write.
Then Install. The steps and the log are as for a single node, and the installer waits for READY for up to 15 minutes.
The Done screen gives the console and API addresses and the initial admin password. Both answer on the API VIP, the service address that follows the control-plane leader. Sign in and choose a new password.
The cluster has one member, so readiness says it is forming. Next: create a join code.