
Stage 1: the console installer
The console installer runs on the screen and on the first serial port (ttyS0,
115200 baud). It is keyboard only and fits an 80x24 terminal. Nothing is
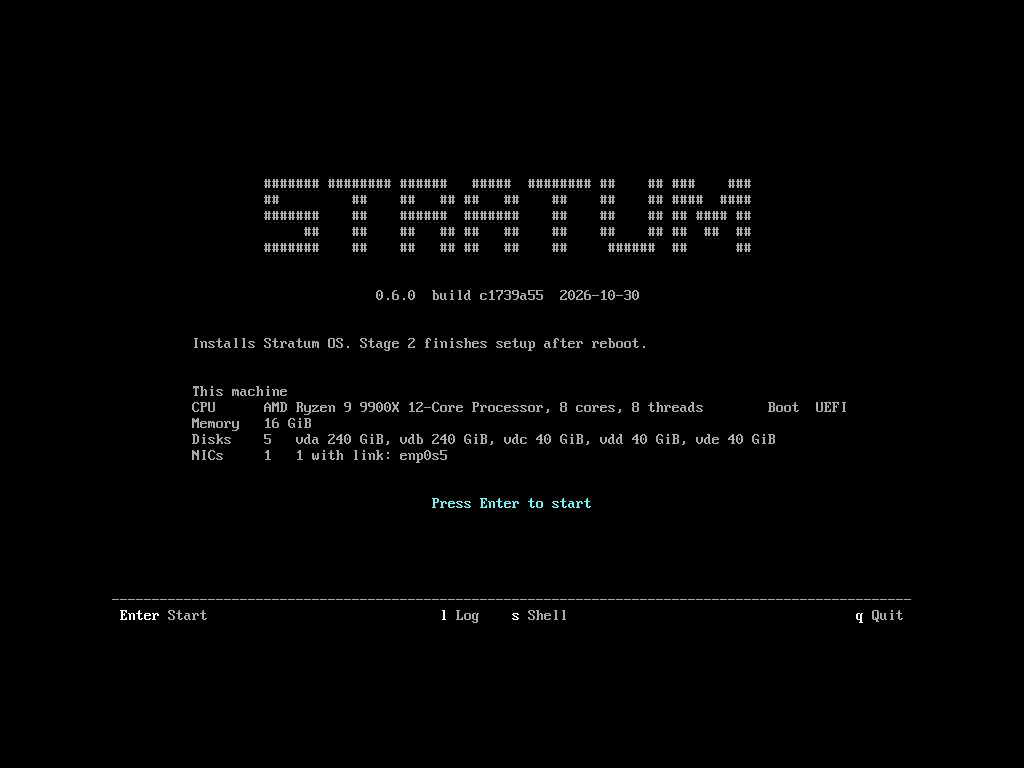
written to any disk before you confirm. The welcome screen lists the disks and
NICs it found, the boot mode and the installer’s build.
The steps
Section titled “The steps”-
Kind. What the machine is for. Choose Single node for this path. New cluster and Join a cluster are for a cluster.
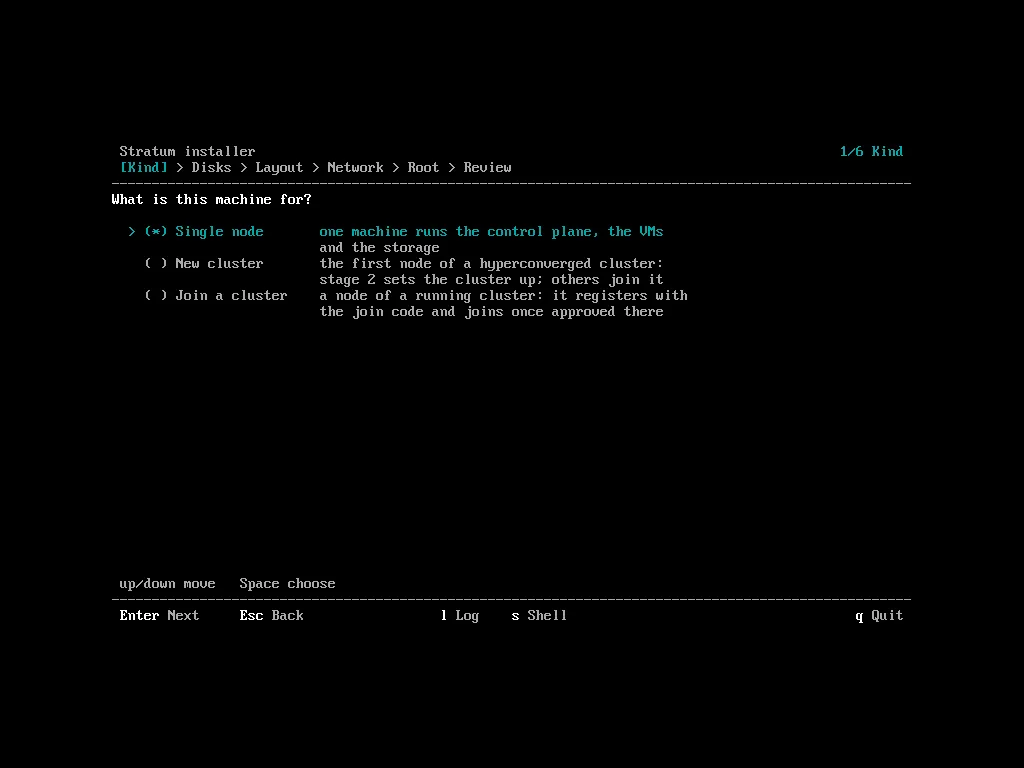
The first screen: single node, new cluster, or join a cluster. -
Disks. Select the OS disk, or two disks for a RAID 1 mirror. Each disk shows its size, type, model, serial, hardware ID, and
IN USEorHOLDS DATAwith what is on it. The first disk selected is disk 1.Keys: up/down move, space select, d details, enter next, esc back.
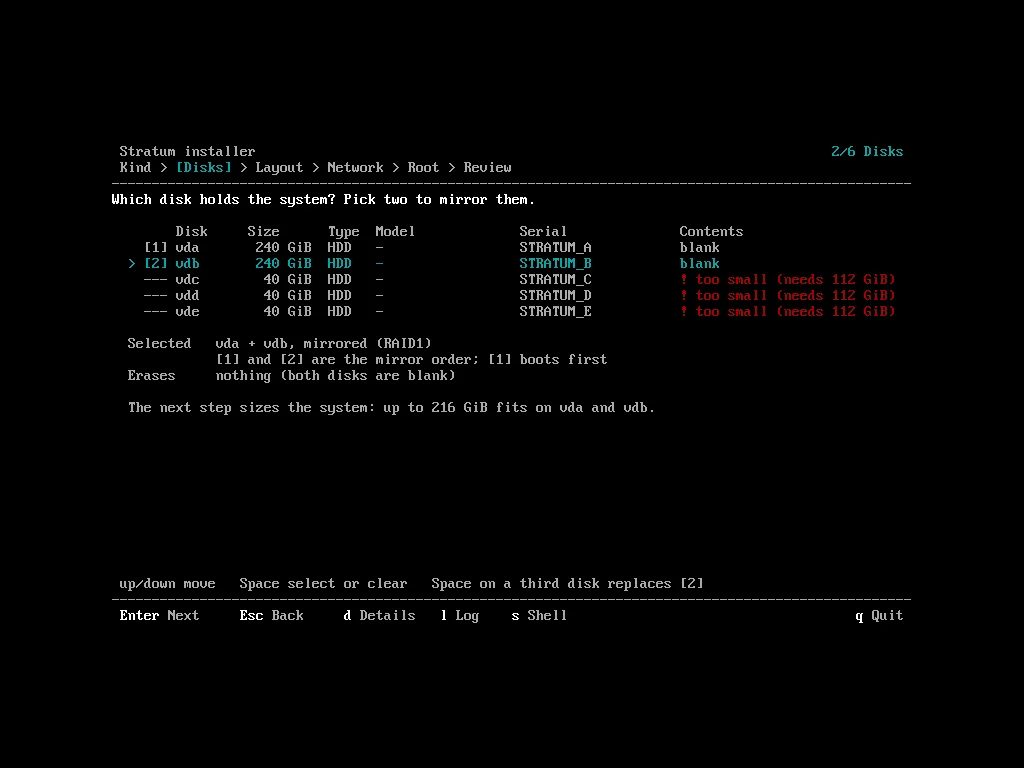
Selecting two disks for a mirror. -
Layout. What the rest of each OS disk is for:
Layout Result System + compute tail (default) The stratumsystem partition, then a free tail of at least 20 GiB that becomes the first storage pool,stratum-compute. Set the system size in GiB: at least 108, 191 by default.Whole disk(s) for the system The system takes each disk whole. There is no stratum-computepool, so stage 2 needs at least one data disk for instance volumes.With two disks, the system and the compute tail are both mirrored. The screen shows the largest size the disks take and the tail each keeps.
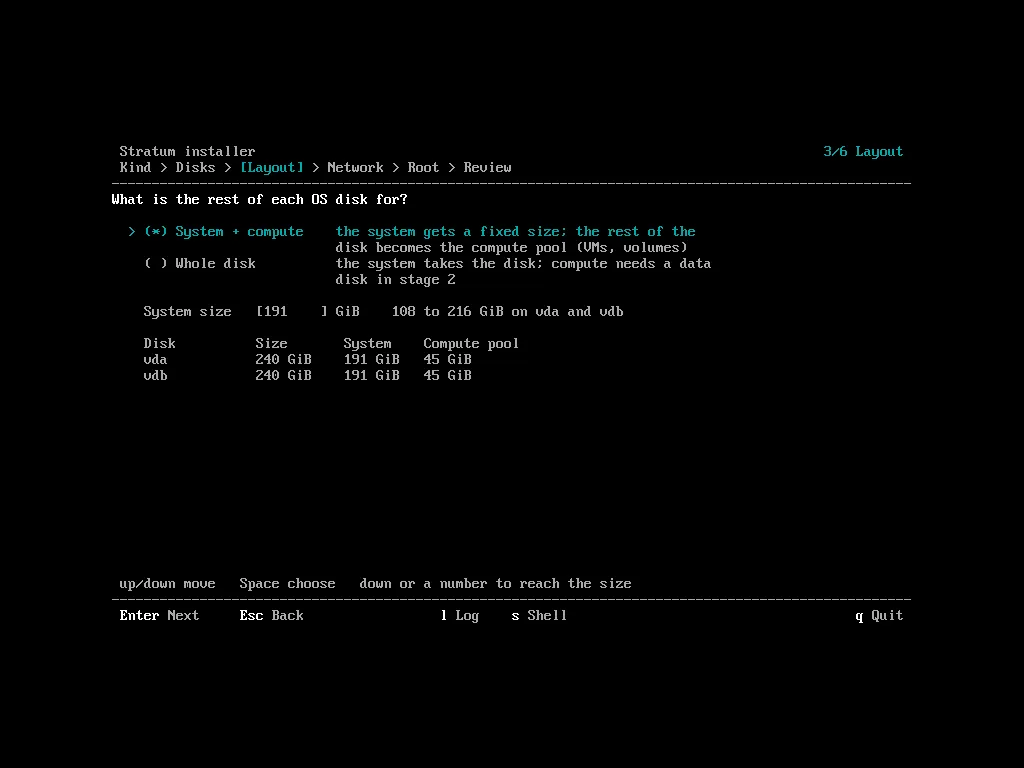
The OS disk layout and the system size. -
Network. The management NIC and the host name, on one screen. Choose a wired NIC (the first with link is preselected), then DHCP or static. For static, enter the address in CIDR form (
192.0.2.10/24) and the gateway. Up to three DNS servers are optional. Wi-Fi NICs are listed but cannot be chosen. A static address is checked with ARP when you leave the step: a host that already answers for it stops you, and its MAC is named.The host name uses lower case letters, digits and hyphens, with dots for a fully qualified name (
node-1.example.com), at most 64 characters.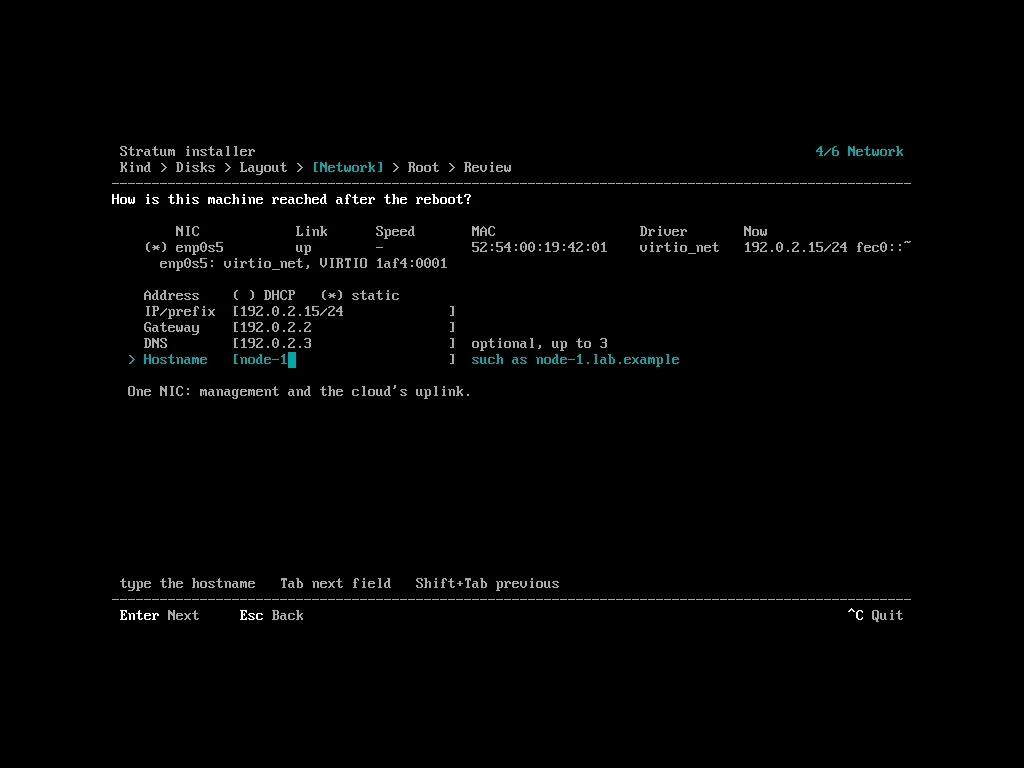
A static address on the management NIC. -
Root. A console password (at least 8 characters, typed twice), SSH public keys, or both. SSH as root accepts keys only; the password is for the console. Paste a key and press enter to add it, or press ctrl+l to load
authorized_keysfrom a USB partition labelledSTRATUM.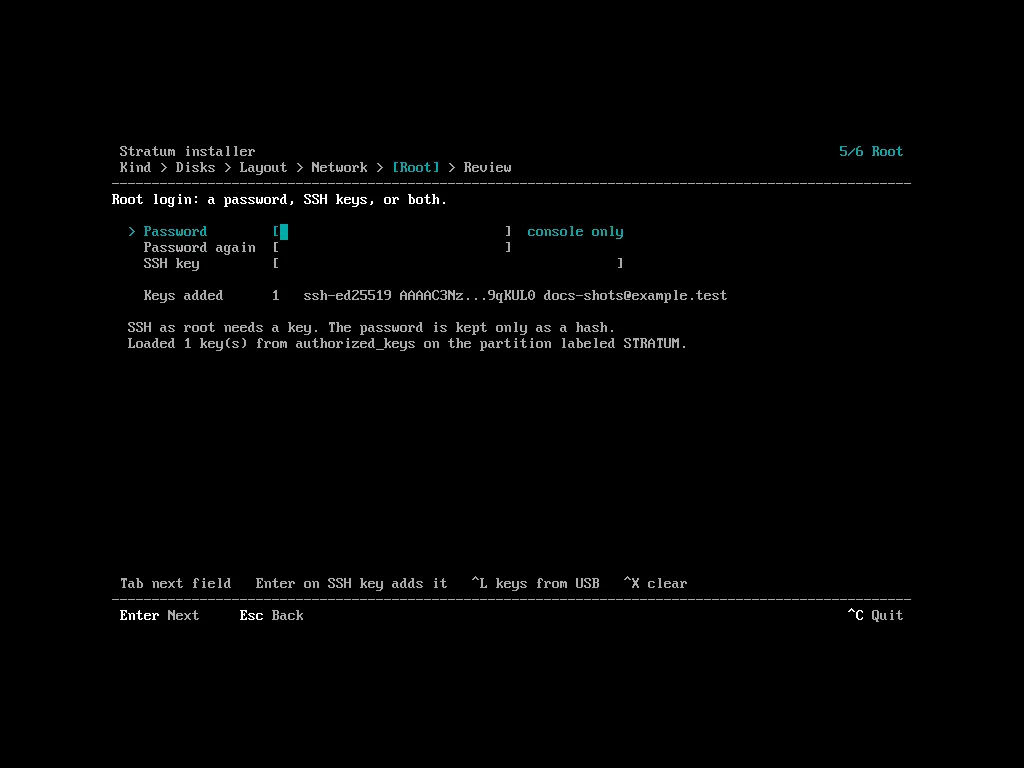
Root access with an SSH key. -
Review. The plan: partitions, volumes, boot entries and warnings. d shows the full plan. enter checks the disks again. When a disk will be erased, a Confirm erase screen follows: type each disk’s name (
sda,nvme0n1, or the last part of its hardware ID), then enter on the last field starts the install.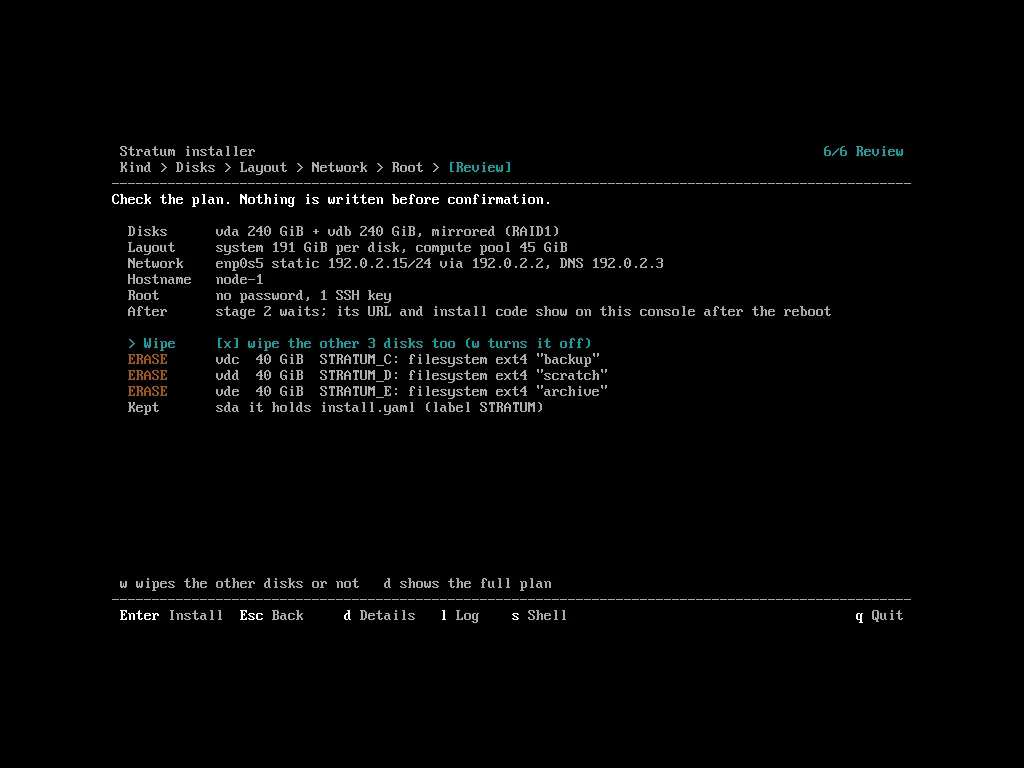
The review: the plan, and the other disks it will wipe (w turns that off). 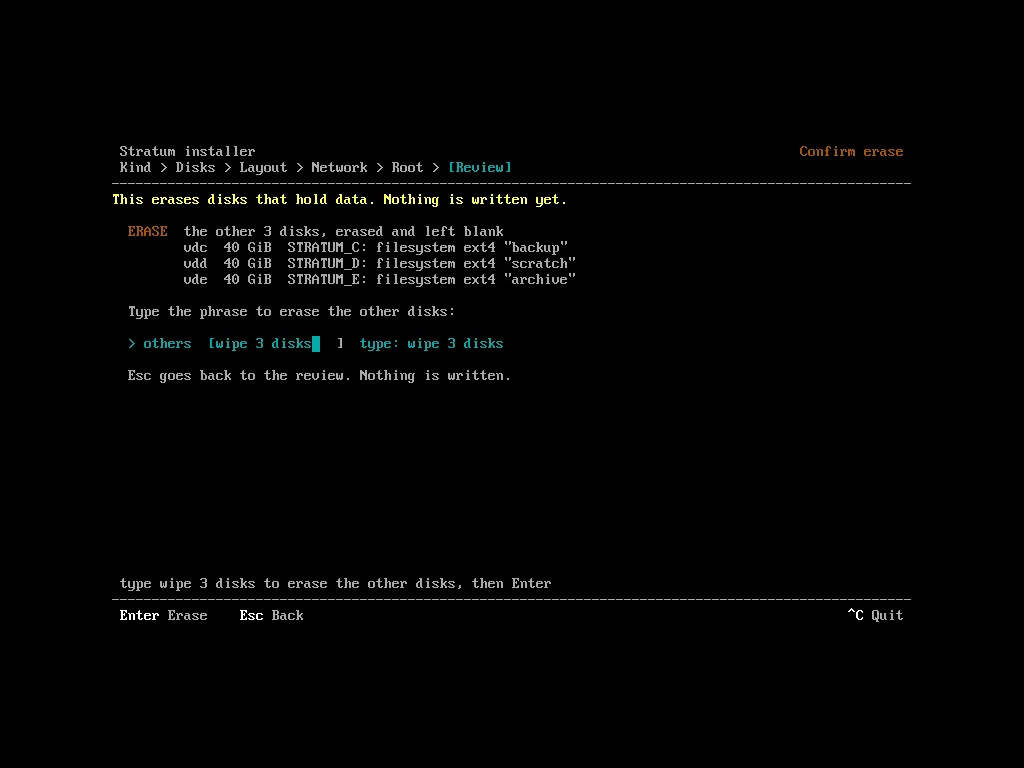
Confirm erase: type the name of each disk that will be wiped. -
Install. Each step shows with its time. When the screen says Installed: remove the install medium first, then press enter to reboot. The installer never reboots by itself, and with the medium still in, the machine boots the installer again.
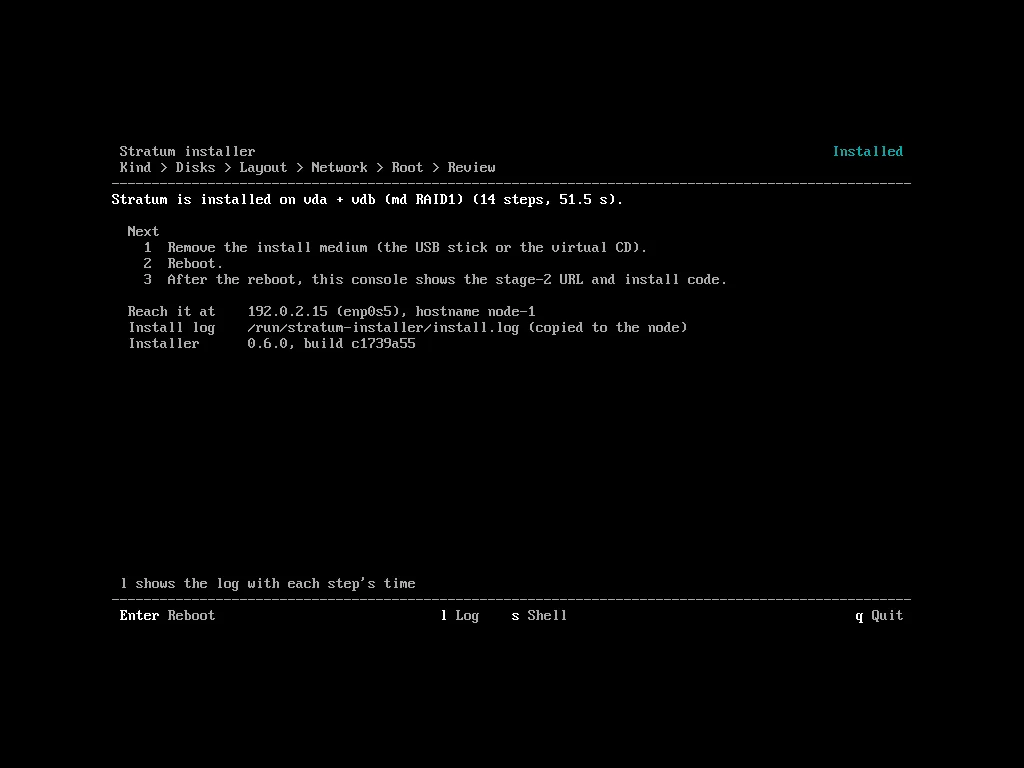
Installed: remove the medium, then reboot.
Except while you type in a field, l shows the installer’s log and s opens a shell.
Other disks are wiped by default
Section titled “Other disks are wiped by default”A reinstall that meets the previous install’s volumes on another disk would
fail or adopt an old pool, so the review wipes every other disk that holds
data. The review lists them and the line [x] wipe the other 3 disks too
is on. w turns it off and the disks keep what they hold.
- They are wiped and left blank, never partitioned or used. To confirm, type
wipe 3 disks(the number listed) on the Confirm erase screen. - Kept, and named on the review: the install medium, mounted disks,
removable or USB disks (select one on the disk step to wipe it), the disk holding
install.yaml, read-only disks, disks with no hardware ID, and one path of a multipath disk. - Disks that hold the system, and any you selected, are confirmed by name.
Disk sizes
Section titled “Disk sizes”The ESP (1 GiB) and /boot (2 GiB) come first, then the stratum partition:
swap (8 GiB), root (32 GiB) and var, sized so that a quarter of the
volume group stays free to extend either. The rest of the disk is the tail.
| Layout | Smallest disk |
|---|---|
| System + compute tail, at the smallest system size (108 GiB) | 131 GiB (141 GB) |
| System + compute tail, at the default size (191 GiB) | 214 GiB (230 GB) |
| Whole disk(s) for the system | 111 GiB (119 GB) |
With a mirror, the smaller disk sets the sizes. /var holds everything that
grows, from container images to the database; it is 102 GiB at the default
size, and the installer warns below 100 GiB.
What the installer refuses
Section titled “What the installer refuses”| Case | What to do |
|---|---|
| Legacy BIOS boot | Enable UEFI boot and boot the stick again. |
| A disk too small | Lower the system size (the message gives the largest that fits), choose a larger disk, or give the disk whole to the system. |
| A disk that holds data and was not confirmed | Type its name on the Confirm erase screen. |
| A mounted disk | It may be the install medium. Choose another disk. |
| Part of an array or volume group that spans a disk outside the install | With the wipe of other disks on (the default) it is wiped too. With it off, press w on the disk step to wipe the other disk as well. |
| A disk with no hardware ID, a read-only disk | Choose another disk. In a VM, give the disk a serial number. |
| Under 6 GiB of memory, one CPU core | Stratum needs 8 GiB and 2 cores. |
| A static address another host answers for | Choose another address. |
| A Wi-Fi NIC, or a NIC that is missing | Use a wired NIC. |
The installer only warns when a disk will be wiped, when two mirror disks differ in size (the mirror uses the smaller), when the machine has under 7 GiB of memory, when an OS disk is removable, USB, a hard disk or one path of a multipath disk, when the gateway or DNS server does not answer, and when the chosen NIC has no link.
The install log
Section titled “The install log”The installer’s log is /run/stratum-installer/install.log on the live system,
in memory. Before the reboot it is copied to the new node as
/var/log/stratum/install-stage1.log, and stratum-installer diagnostics
includes it.
First boot: the install code
Section titled “First boot: the install code”The node boots from its disks. It loads the release’s container images (a minute or two), then starts the install service and shows how to reach it, on the console and in the login banner:
  Stratum installer: waiting for configuration.
Web installer https://192.0.2.10:9443/ Install API https://192.0.2.10:9443/v1/installer Install code 7Q4M-2KXD TLS SHA-256 44:F4:A8:C0:...:42:05- Install code: eight characters that unlock stage 2. A new code is made at
every boot. As root on the node it is also in
/run/stratum-installer/install-code. - TLS SHA-256: the fingerprint of the installer’s self-signed certificate. Check it in the browser or pass it to the CLI.
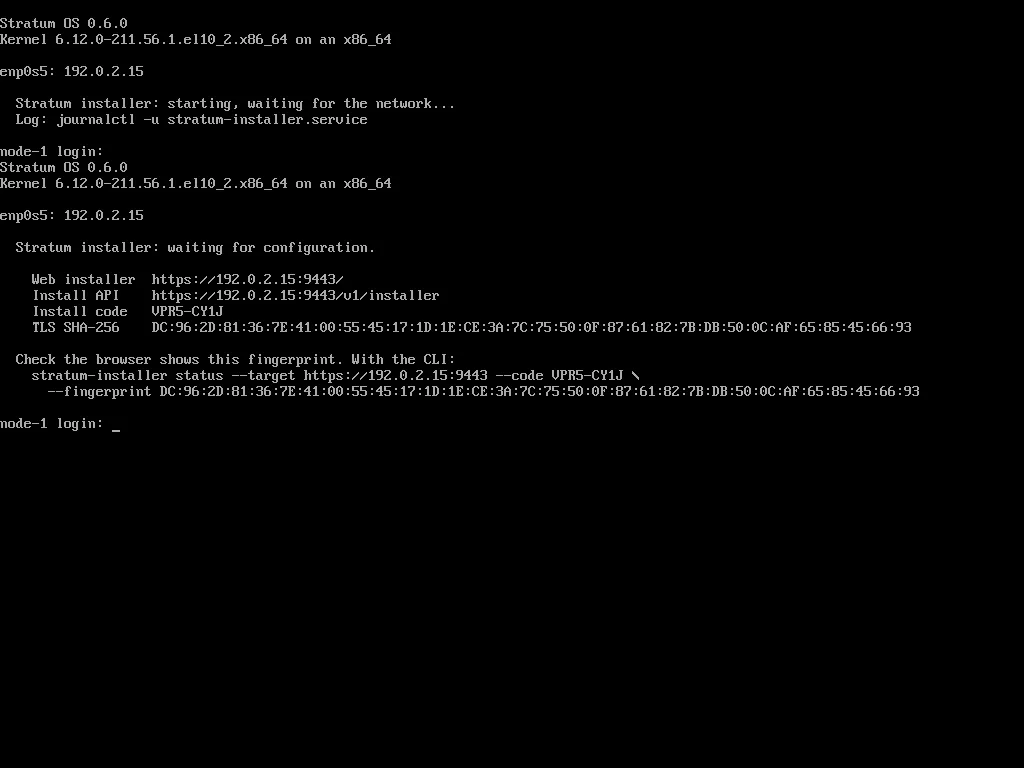
Continue with stage 2.
Leaving the installer
Section titled “Leaving the installer”ctrl+c on any screen except Installing drops to a shell. Start the installer again with:
stratum-installer tui