
Stage 2: the install service
The install service answers on the node’s management address, port 9443, over HTTPS with a self-signed certificate. Every step below shows the web installer and the CLI side by side; choosing a tab switches every section on the page. Both edit the same draft on the node.
The examples use the node 192.0.2.10. Replace it, the install code and the
fingerprint with what the node’s console shows.
Connect
Section titled “Connect”- Open
https://192.0.2.10:9443/. - The browser warns about the certificate. Open the certificate details and compare its SHA-256 fingerprint with the TLS SHA-256 line on the node’s console. Continue only when they match.
- Type the install code and select Unlock.
After three wrong codes the browser’s address is locked out for a growing time, up to 5 minutes.

stratum-installer is installed on the node. Run it there, as root over SSH
with the key from stage 1. A standalone download for a workstation is not
published yet.
Set the target, code and fingerprint once:
export STRATUM_INSTALLER_TARGET=https://192.0.2.10:9443export STRATUM_INSTALLER_CODE=7Q4M-2KXDexport STRATUM_INSTALLER_FINGERPRINT=44:F4:A8:C0:...:42:05stratum-installer status--target, --code and --fingerprint do the same per command. The
fingerprint pins the certificate; --insecure skips the check instead.
status ends with the one command that moves the install on.
Check the machine
Section titled “Check the machine”The Machine step shows the install mode, the CPU (and whether KVM is ready), memory, firmware, every disk with its health and hardware ID, the NICs, and PCI devices such as GPUs. It changes nothing. A missing virtualization extension shows here as an error.
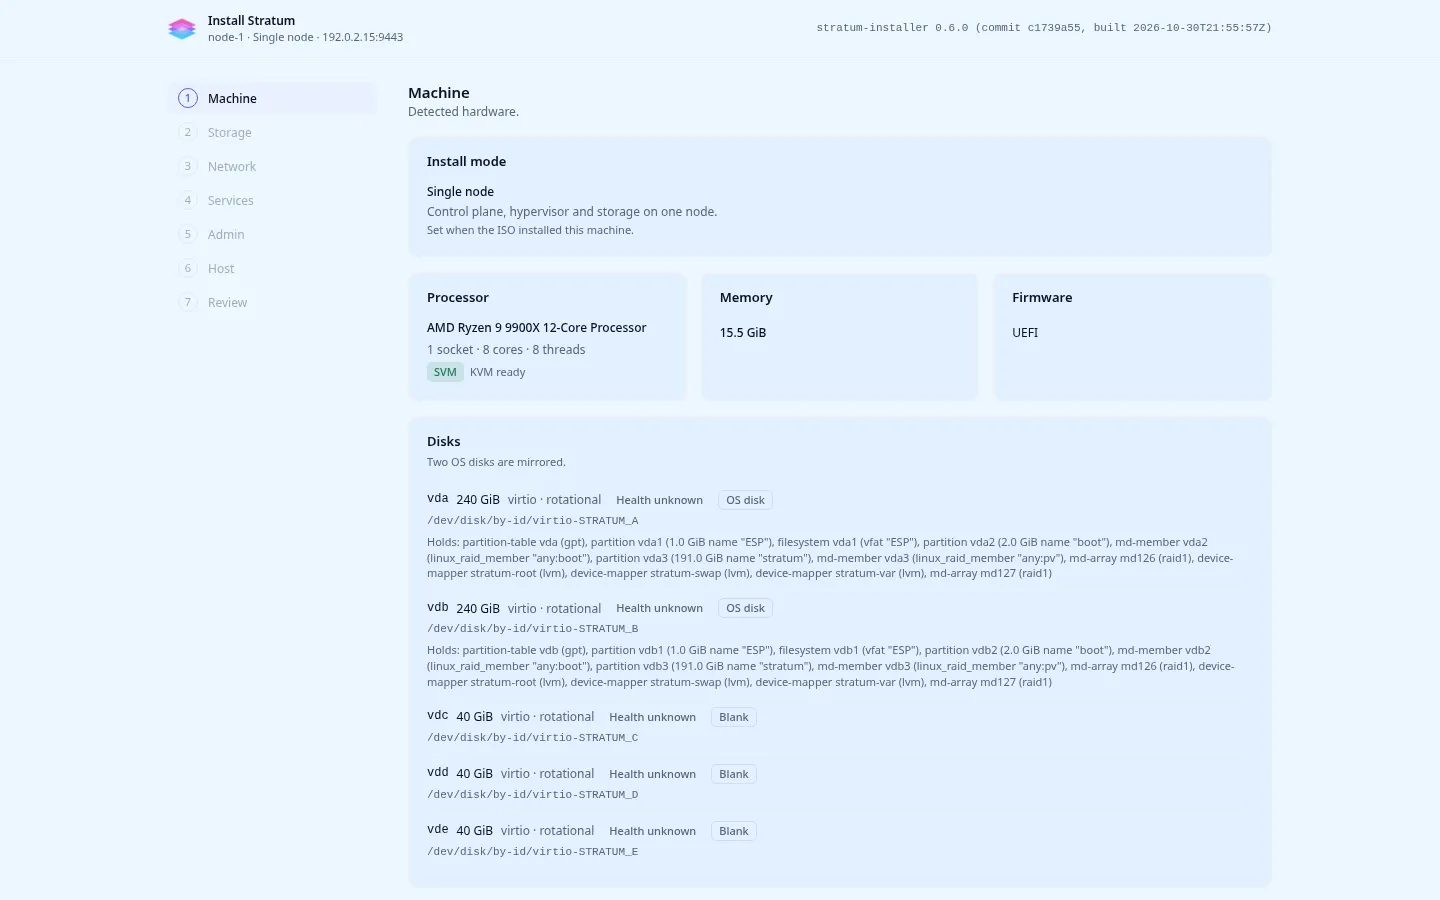
stratum-installer hardware # CPU, memory, disks with their by-id names, NICs, devicesstratum-installer options # install modes, limits, base images, NTP suggestionEvery command takes -o json or -o yaml for scripts:
stratum-installer hardware -o json | jq '.disks[] | {name, byId, dataDiskEligible, ineligibleReason}'Install mode
Section titled “Install mode”The mode is the kind chosen in stage 1. This page is the single-node install: the mode is Single node. The web installer shows it, read-only, at the top of the Machine step, and a draft that names another mode is refused. For a cluster, see Install the first node.
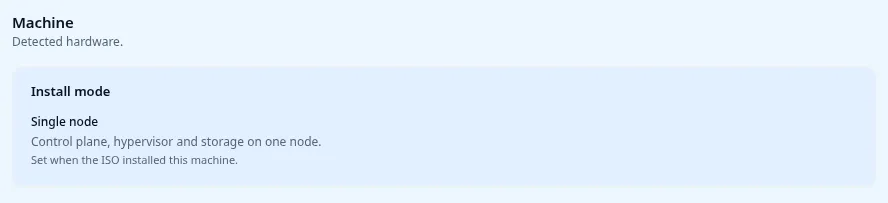
The structured config’s first field. A config without it is a single-node one.
{ "mode": "single-node", "profile": "single-node" }Storage
Section titled “Storage”The OS disk layout from stage 1 decides the first pool:
- System + compute tail: the first pool is
stratum-compute, on the OS disks’ free tail. Data disks are optional, each an extra pool. - Whole disk: at least one data disk is required. The first compute disk becomes the first pool, and its storage class is the default.
Each data disk becomes an LVM-thin pool with a storage class. The pool is the node’s space on that disk; the class is what tenants choose when they create a volume (it defaults to the pool’s name). Data disks can first be combined into MD RAID arrays, each then used like one disk:
| Level | Members | Size | Survives |
|---|---|---|---|
| RAID 1 | 2 or more | the smallest member | all members but one failing |
| RAID 10 | an even number, 4 or more | half of the members | one failure per mirrored pair |
| RAID 0 | 2 or more | the sum | nothing: one failed disk loses the pool |
Every selected disk is wiped. A disk that holds data needs an explicit confirmation.
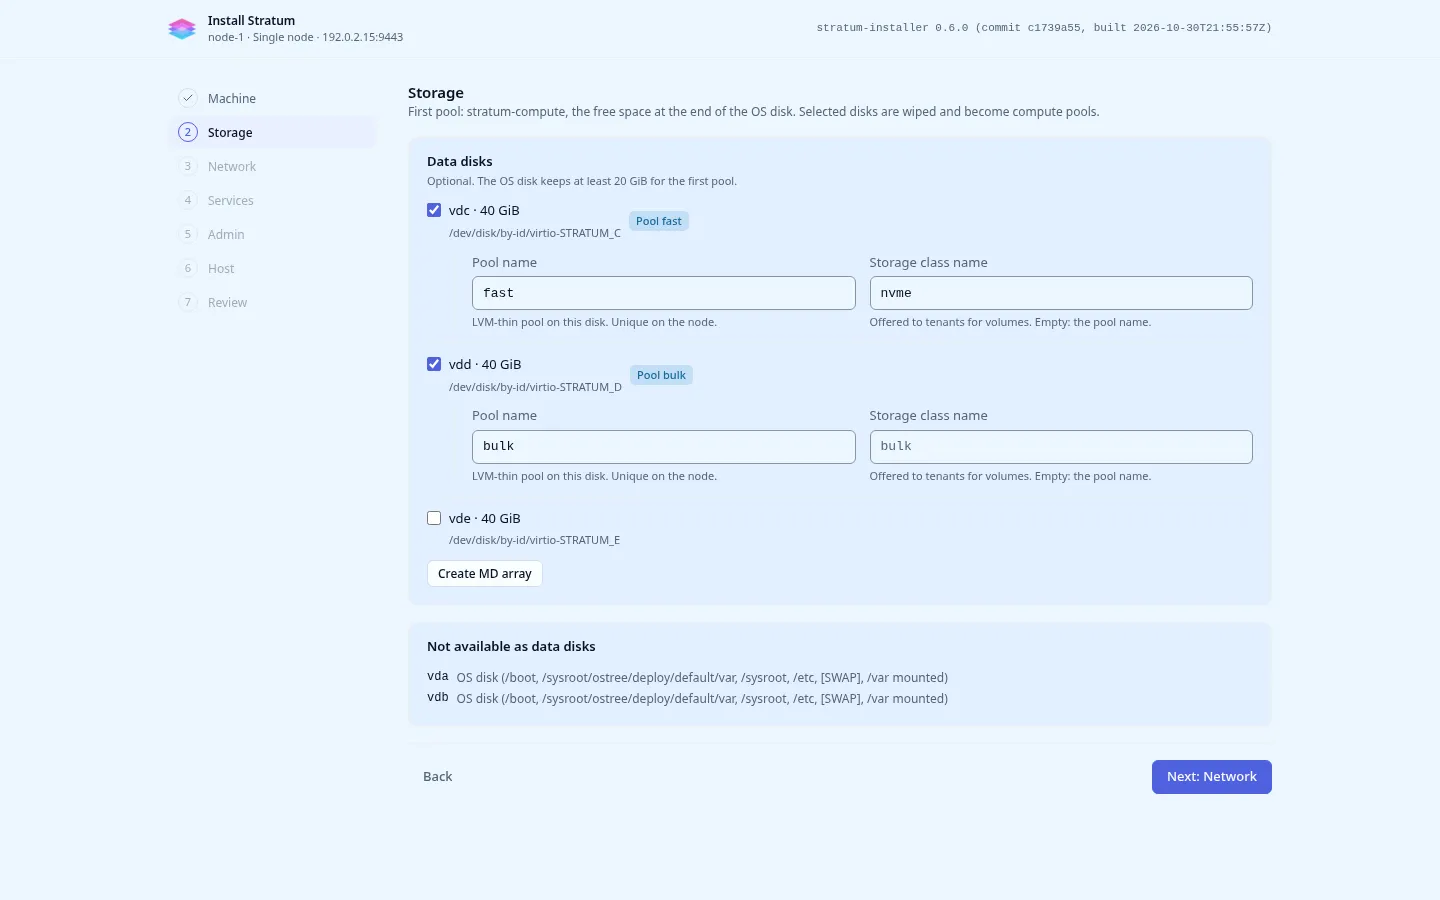
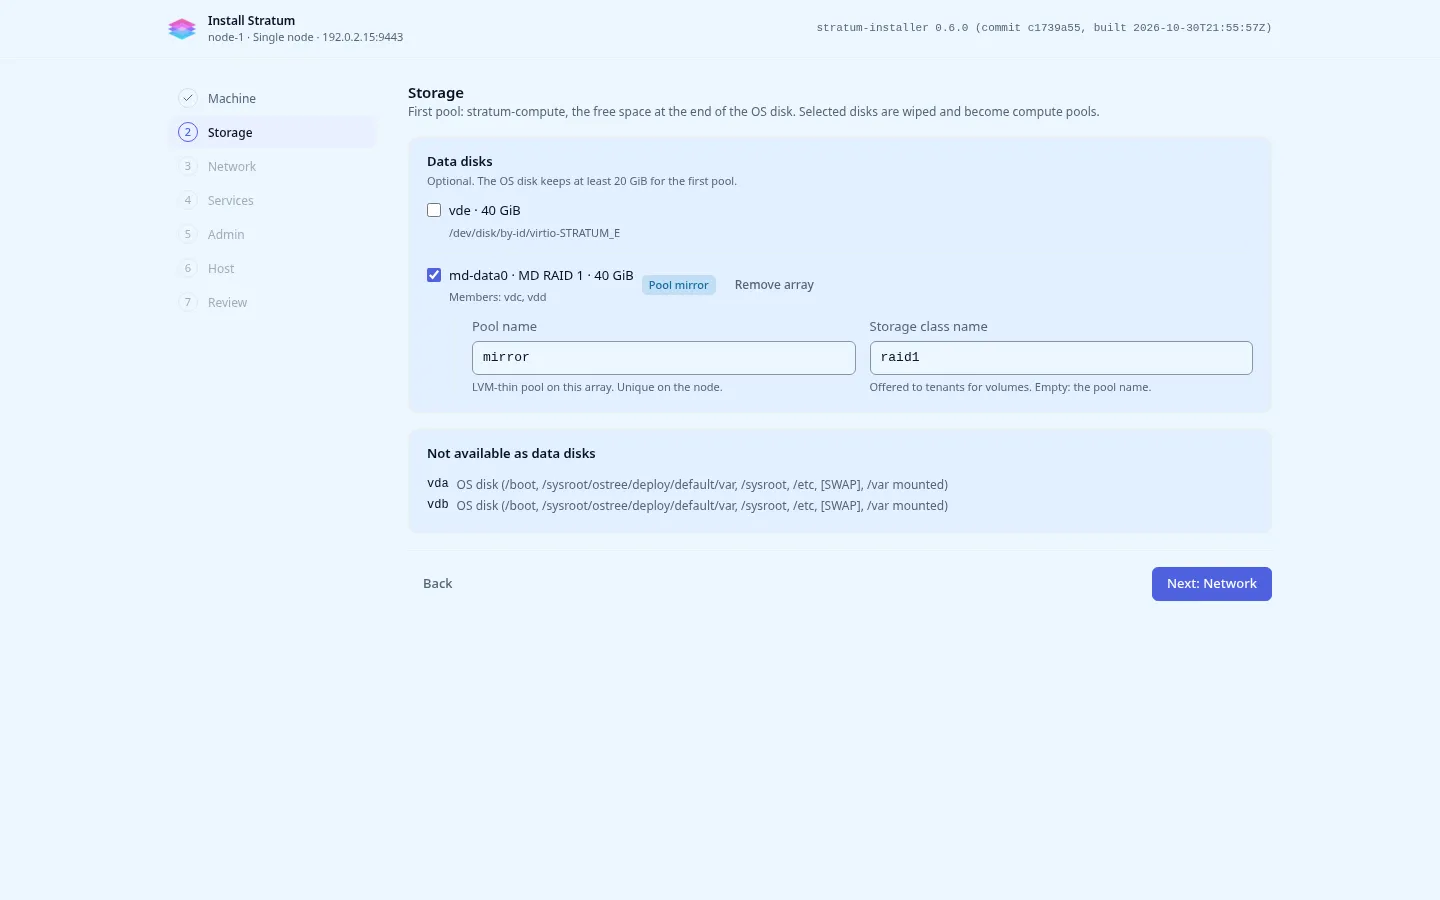
In the Storage step, select each data disk, then set its Pool name and Storage class name. New MD array combines disks: choose the members, the level and a name; the array then appears as one disk to use. A disk that holds data asks to type its name before it is wiped.
"storage": { "mdArrays": [ { "name": "md-data0", "level": 1, "members": ["/dev/disk/by-id/nvme-EXAMPLE_A", "/dev/disk/by-id/nvme-EXAMPLE_B"] } ], "disks": [ { "byId": "/dev/md/md-data0", "use": "compute", "poolName": "fast", "storageClassName": "nvme" }, { "byId": "/dev/disk/by-id/nvme-EXAMPLE_C", "use": "compute", "poolName": "bulk" } ], "wipeConfirm": ["/dev/disk/by-id/nvme-EXAMPLE_C"]}Names are 3 to 40 lowercase letters, digits and hyphens, starting with a letter.
stratum-compute, stratum, stratum-block and data are reserved. List a
disk in wipeConfirm when it holds data.
Network, names and time
Section titled “Network, names and time”| Setting | Default | Notes |
|---|---|---|
| Uplink interface | The NIC the installer runs on | Where tenant traffic leaves. Another NIC needs an IPv4 address first. |
| Default VPC CIDR | 172.31.0.0/16 |
Each project’s first VPC. Must not overlap the node’s networks. |
| Floating IP ranges | A free /24 the installer suggests |
Required. Instance addresses on the LAN. Route each range to the node on the LAN router. Check nothing else on the LAN uses it. |
| DNS parent domain | cloud.internal |
Names for the console, API, load balancers and instances. Need not be public. Avoid .local; stratum.internal and compute.internal are refused. |
| LAN DNS address | The management address | Where the node answers DNS for the parent domain. |
| Region | local-1 |
Part of every resource name. Cannot be changed after the install. 3 to 30 characters. |
| Upstream DNS servers | None | Optional. Where instances’ resolvers forward names the cloud does not serve. Up to 4 IPv4 addresses. With none, they resolve from the internet’s root servers. |
| Fallback to root servers | Off | Advanced. When every upstream fails, resolve from the root servers instead of failing. |
| NTP servers | Offered by DHCP, else the public NTP pool | Up to 8. An offline site lists its own. |
The floating IP range must not overlap the node’s networks, the default VPC, or
ranges the platform uses on the node: 100.64.0.0/10, 10.255.0.0/16,
10.88.0.0/16 and 10.89.0.0/16.
The Network step has three panels: Uplink and addresses, Names and Time. Use the suggested range fills the floating IP range, and a note shows the route to add on the LAN router. Use this machine’s resolvers fills the upstream DNS servers with the node’s own.
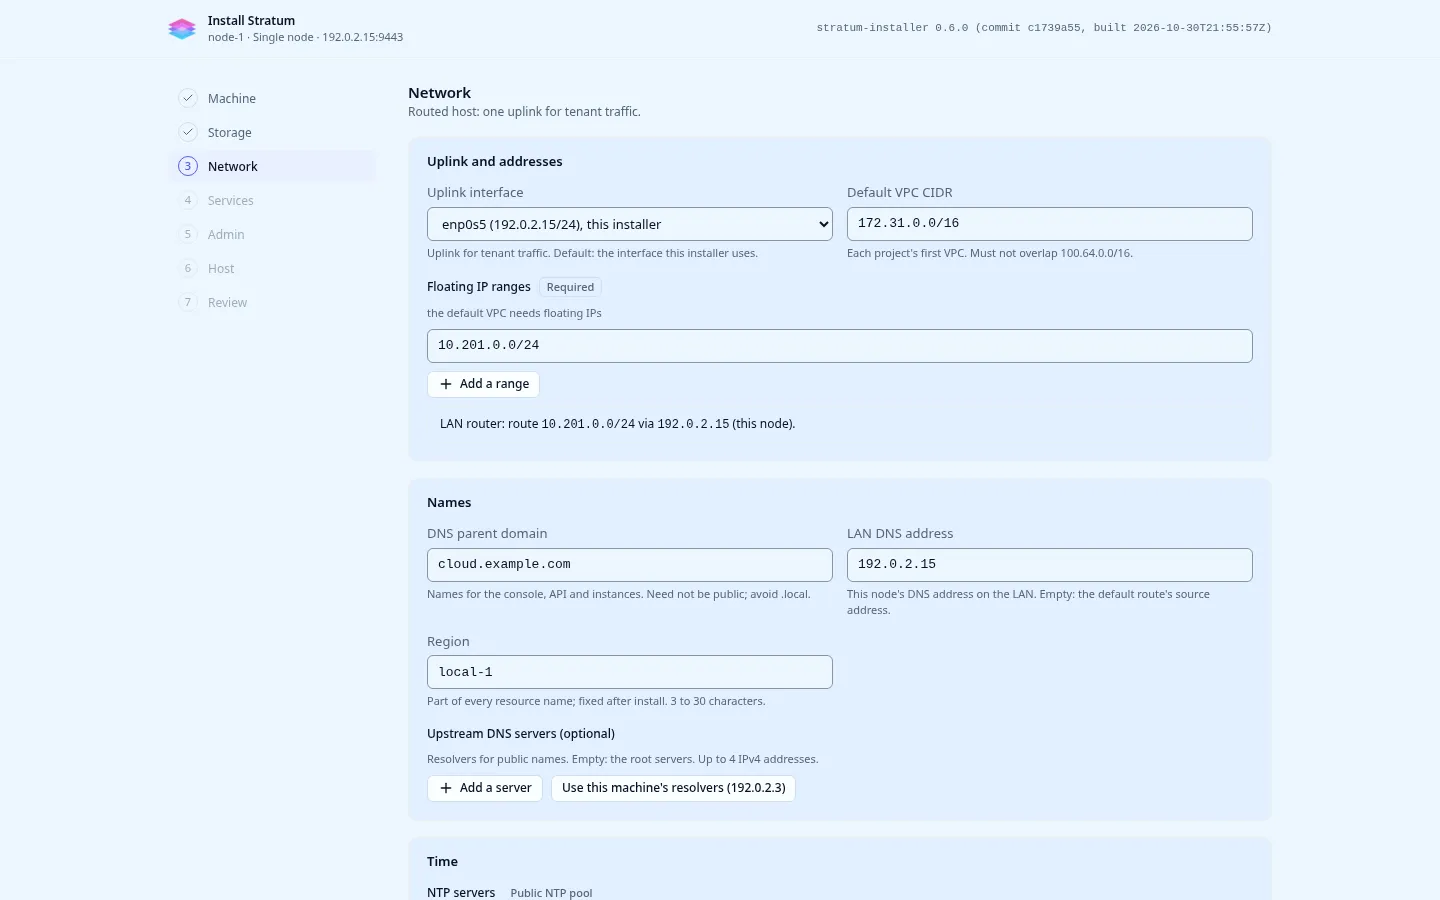
"region": "local-1","dns": { "parentDomain": "cloud.example.com", "lanAddress": "192.0.2.10", "upstreamServers": ["192.0.2.53"], "upstreamFallback": false},"network": { "uplinkInterface": "enp1s0", "topology": "routed-host", "floatingIpCidrs": ["198.51.100.0/24"], "defaultVpcCidr": "172.31.0.0/16"},"time": { "ntpServers": ["ntp.example.com"] }stratum-installer options -o json shows the suggested floating IP range under
modes[].network.floatingIpCidrs.suggested, and the NTP suggestion under time.
Services
Section titled “Services”Client VPN, Backup, Secrets Manager and Security are on by default. Each can be switched off now and on again later; see Managed services.
The Services step has one switch per service.
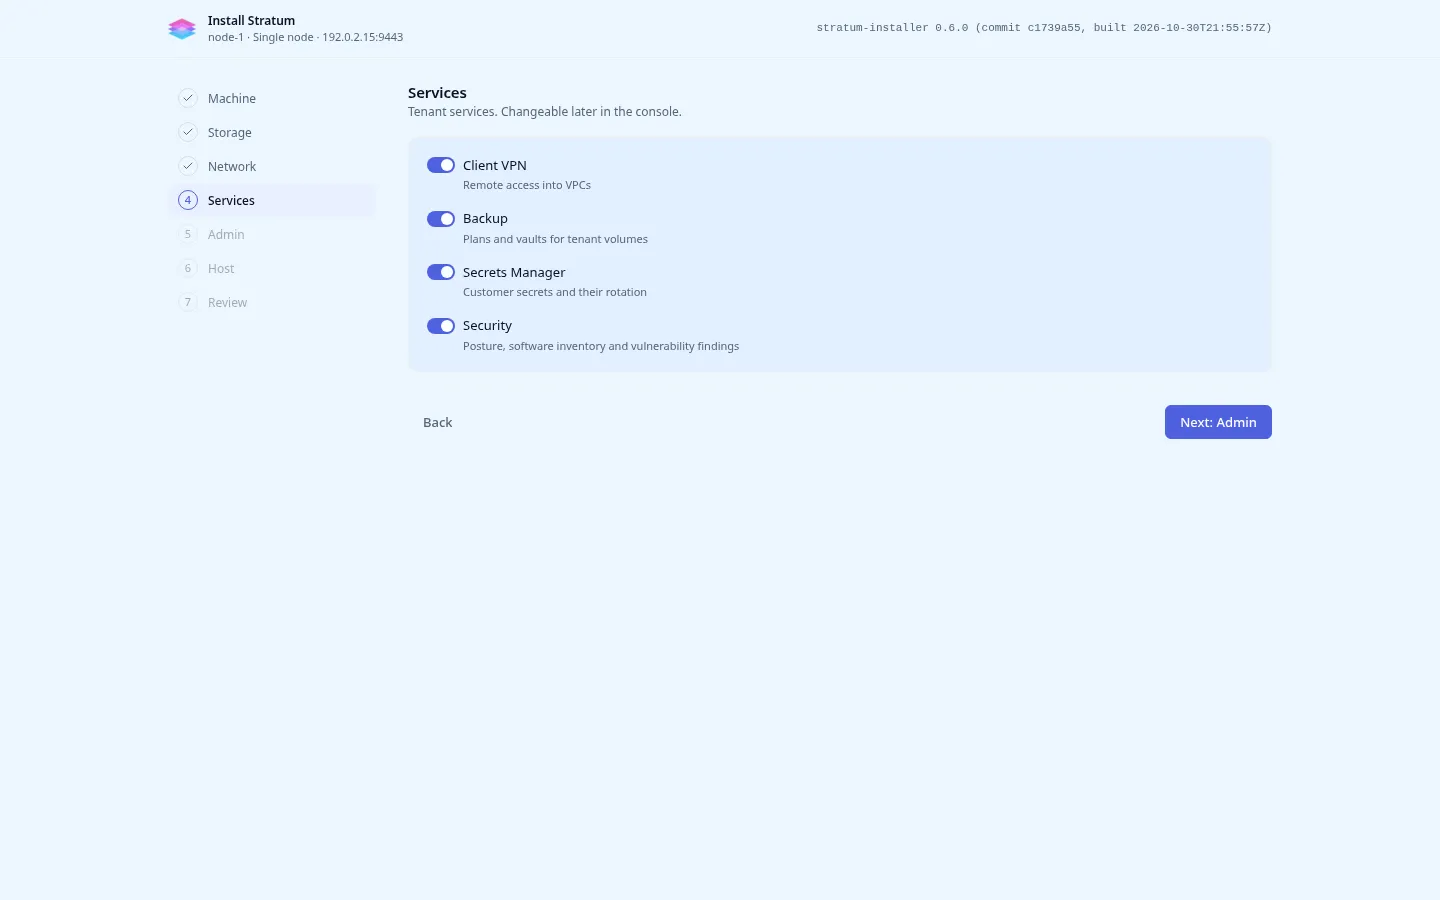
"services": { "client-vpn": false }A service left out stays on.
Images
Section titled “Images”The install registers no images. Add them once the cloud runs: from the
base-image catalog, or upload your own qcow2 or raw image. See
Images. A node.yaml that lists images
is refused.
Administrator
Section titled “Administrator”The first console account. Only the email is chosen; the install generates a one-time password, shown when the install ends.
The Admin step has the email field.
"admin": { "email": "admin@example.com" }What the node keeps for itself, and a few advanced settings.
| Setting | Default | Notes |
|---|---|---|
| Host reservation | max(6 GiB, 10% of RAM) of memory and max(2, 6% of the threads) of vCPUs | Kept back from instances for the platform. At least 1 vCPU and 4 GiB. See Host reservation. |
| Development mode | On for a single node | Publishes the platform’s web UIs on the node’s loopback, and shows the OpenBao root token and the database password to admins. Turn it off for anything but a lab. |
| Release mirror | The release’s own mirror | Where the cloud looks for newer releases. Empty switches the check off, for a site upgraded from media. |
| Release token (optional) | None | From the Stratum Account: opens the stable release channel. Kept in OpenBao and never shown again. |
The Host step has the reservation, and the advanced settings under it.
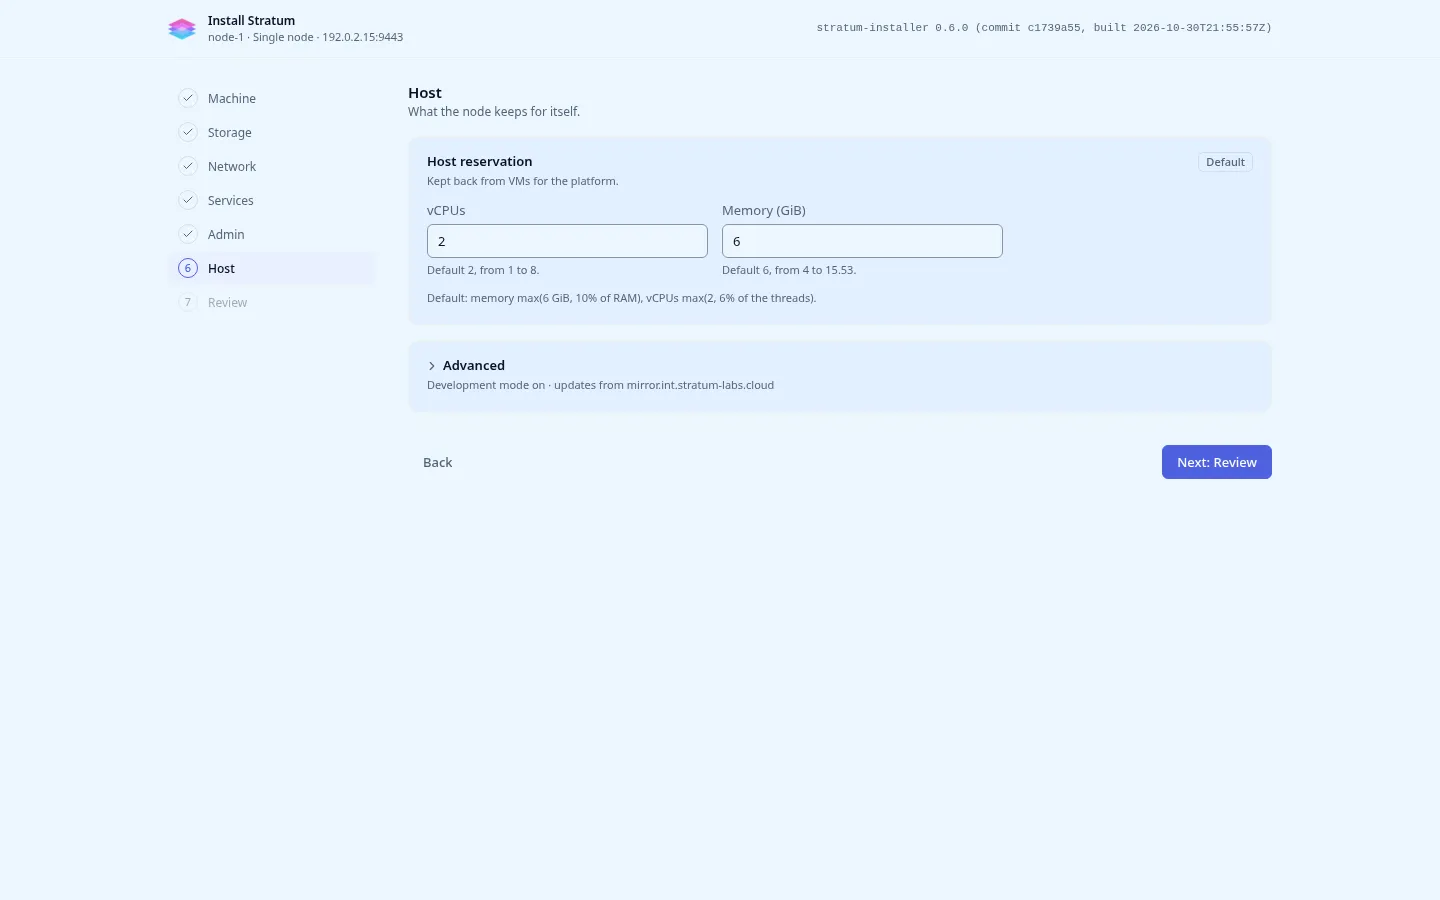
"hostReservation": { "vcpus": 4, "memoryBytes": 12884901888 },"advanced": { "devMode": false, "upgradesMirrorUrl": "https://mirror.example.com" }Send hostReservation only to change the computed default. config get -o json
shows it, with its bounds.
Review and install
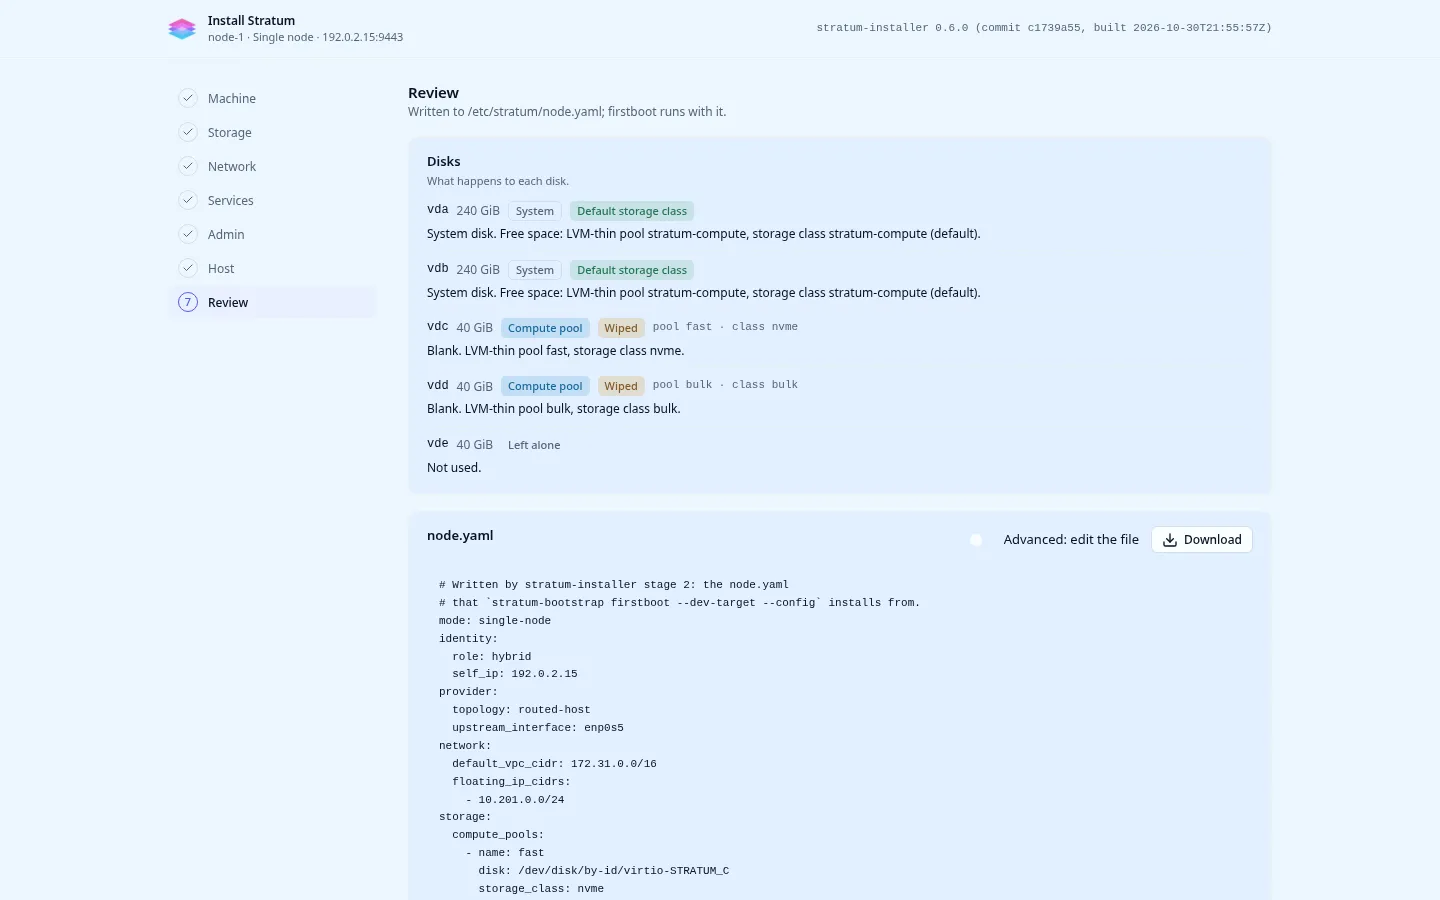
Section titled “Review and install”Review lists what to fix (each with a link to its step), what happens to each
disk, warnings, and the node.yaml the install will write. The file can be
downloaded, or edited directly with Advanced: edit the file. Install
starts the install.
stratum-installer config get -o json | jq .config > config.json$EDITOR config.jsonstratum-installer config set -f config.jsonstratum-installer config get # the answers, the storage plan, the validationstratum-installer config get --yaml # the exact node.yaml the install writesstratum-installer installconfig set stores the draft even when it does not validate, prints the errors
by field and exits 2. install sends the draft’s revision as If-Match, so a
draft changed in between, in the browser or by another shell, is refused
(DRAFT_CHANGED) instead of installed; read it again and retry. validate -f config.json checks a file without storing it.
To send a whole node.yaml instead, see CLI and node.yaml.
Follow the install
Section titled “Follow the install”The install has twelve steps (checking the machine, installing packages, preparing storage, loading the container images, starting the control plane and the rest), then waiting for READY, up to 15 minutes. It runs on the node on its own: closing the browser or the CLI stops nothing.
The progress page shows each step and the live log.
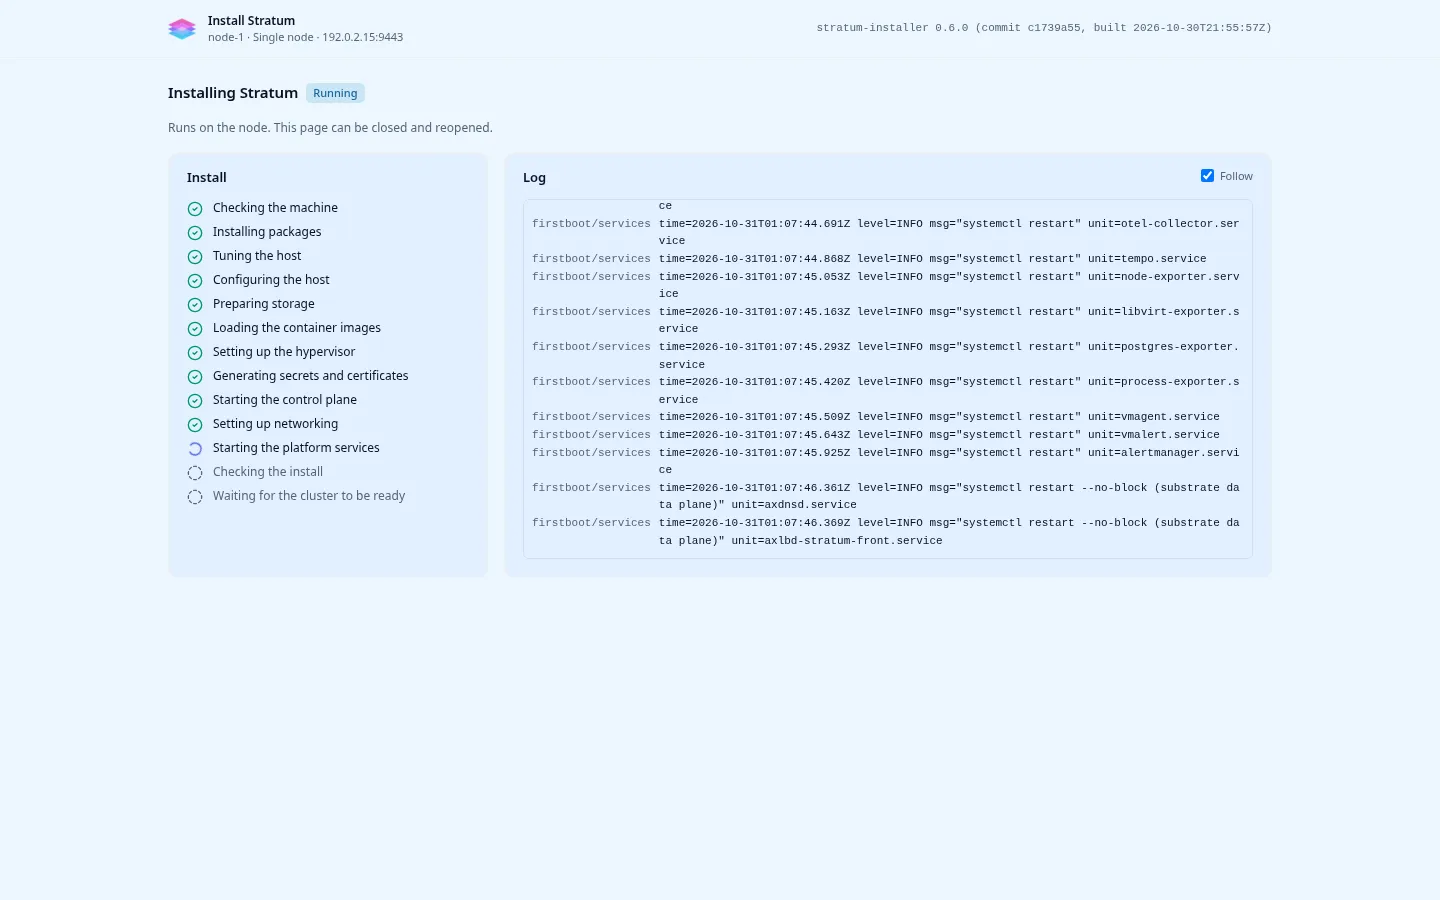
install follows the install until it ends. From another shell, or after a
disconnect:
stratum-installer watch # replays from the start, then followsstratum-installer watch --logs # with the platform installer's own outputExit codes: 0 installed, 1 failed or unreachable, 2 input refused.
If it fails
Section titled “If it fails”The failed step is named as a person would say it, for example Preparing storage failed, with the error. On a single node a re-run is safe: completed steps are kept, and attempts are numbered.
Retry install runs it again, Edit configuration goes back to the form, and Download diagnostics saves the support bundle. When the install finished but the cloud was not ready in time, Recheck readiness waits for READY again without installing.
stratum-installer report # the failed step, the error, what to dostratum-installer install # run it againstratum-installer recheck-readiness # only wait for READY againstratum-installer diagnostics -o diagnostics.tgzThe diagnostics bundle holds the logs, the event stream, the report, the draft
and the installed node.yaml with secrets removed, the hardware and the
installer’s journal. It holds no password, key or token, but it names your host
names and addresses. The full log on the node is /var/log/stratum/install.log.
Stratum is installed shows the console and API addresses, the admin user and the initial password, the OpenBao recovery key, a note that no images are installed, readiness while the cloud starts, and the LAN settings to add.
Save the OpenBao recovery key now, off the node (Copy or Download). It is
shown only until the first sign-in. It unseals OpenBao when the node’s TPM
cannot, and root on the node can print it again later with
sudo stratum-bootstrap recover openbao-key. A node with no TPM says so: its
unseal key is on its disk.
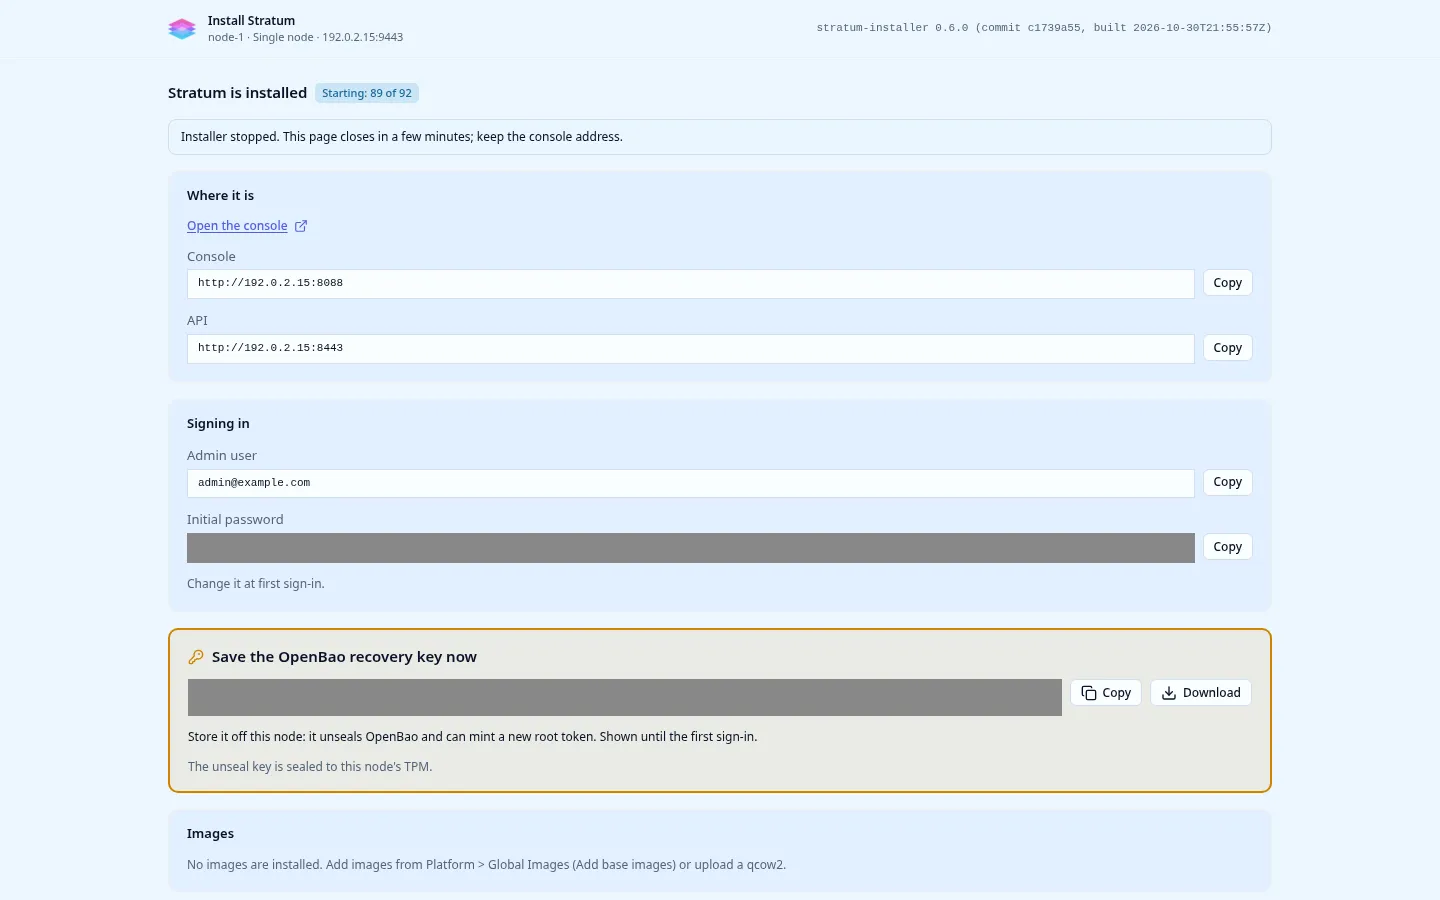
install and watch follow the cloud’s first start (Starting: 61 of 76 ready),
then end with the sign-in details and the recovery key:
Sign in to the console
Console http://192.0.2.10:8088 User admin@example.com Password <the install-time password> one-time; change it at first sign-instratum-installer report # the outcome, sign-in, recovery key, next stepsstratum-installer client-setup # the LAN route and DNS forward, with commands per OSNext: first sign-in, then reach the cloud from your LAN.